Tuesday, February 17, 2009

MAN RAY
Emmanuel Radnitzky (August 27, 1890 – November 18, 1976)

Emmanuel Radnitzky & Salvador Dali

Man Ray, born Emmanuel Radnitzky (August 27, 1890 – November 18, 1976), was an American artist who spent most of his career in Paris, France. Perhaps best described simply as a modernist, he was a significant contributor to both the Dada and Surrealist movements, although his ties to each were informal. Best known in the art world for his avant-garde photography, Man Ray produced major works in a variety of media and considered himself a painter above all. He was also a renowned fashion and portrait photographer.


Man Ray, Le Violon d'Ingres, 1924
Epreuve gélatino-argentique montée sur papier
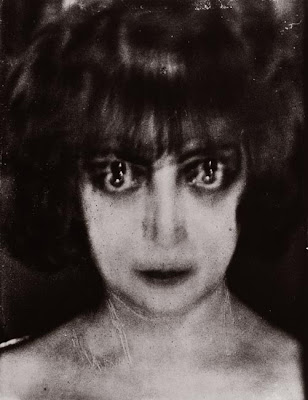

RAY-0-GRAMS
The technology of photography was one of the favorite media of the Dada artist Man Ray; his inventive technique of placing objects on light-sensitized paper as in his Rayogram, (1922), showed the abstract possibilities of photograph. He was always exploring new mechanical ideas and "his crisp and ethereal photographs and maliciously witty objects were a revelation" (Gale 197).

"When I saw I was under attack from all sides, I knew I was on the right track."
-Man Ray

“I do not photograph nature. I photograph my visions.”
–Man Ray


A creator needs only one enthusiast to justify him
–Man Ray


An original is a creation motivated by desire. Any reproduction of an originals motivated be necessity. It is marvelous that we are the only species that creates gratuitous forms. To create is divine, to reproduce is human.
–Man Ray


All critics should be assassinated.
–Man Ray

Don't put my name on it. These are simply documents I make.
–Man Ray


I paint what cannot be photographed, that which comes from the imagination or from dreams, or from an unconscious drive.
–Man Ray

I photograph the things that I do not wish to paint, the things which already have an existence. -Man Ray

It has never been my object to record my dreams, just the determination to realize them.
-Man Ray

Of course, there will always be those who look only at technique, who ask 'how', while others of a more curious nature will ask 'why'. Personally, I have always preferred inspiration to information.
-Man Ray

One of the satisfactions of a genius is his will-power and obstinacy.
-Man Ray

To me, a painter, if not the most useful, is the least harmful member of our society.
-Man Ray

RAY-O-
WANNABEES
but still pretty cool....


Sunday, February 15, 2009

QUALITY of LIGHT

Quality of Light

Equipment Needed: Camera, minimum of 1 roll of 36 exposure ISO 400 film

Make the quality of light the subject of your photographs. Look for patterns of light and situations where you are more aware of the light than the actual object or scene.
Remember that the presence of strong light often means that there will be heavy or strong shadows. Experiment with at least 10 – 15 frames making images where you are not sure if the photograph will emphasize the shadows or the light casting the shadows.

Make sure to Bracket!!!
Do not use flash or strobe for this assignment!
Use only ambient/available light (this includes sun, lamps, overhead lights, etc..)


Some lighting conditions to consider:

reflected/absorbed soft/harsh

bright/diffused dawn/dusk


hard light with distinct shadows


soft – subtle, diffused light


artificial: florescent and mercury vapor light


overcast or open shade in direct sun


bright or intense


absorbed or obstructed


dawn - dusk - midday

The color, direction, quantity, and quality of the light you use determines how your subjects appear. When shooting outdoors, the direction of light changes as the sun moves across the sky. The shape and direction of shadows are altered. Direction of sunlight greatly affect the appearance of a scene. The quality of sunlight depends on its strength and position. Strong, direct sunlight is "hard" because it produces dark, well-defined shadows and brilliant highlights. Sunlight is hardest on clear summer days at noon. Sunlight can be diffused by clouds, fog, haze, mist, or pollution in the air. This diffused light is softer; it produces gentle, soft shadows and dull highlights. Interesting effects can be achieved by changing the angle of the light. As you turn your subject, change the camera viewpoint, or wait for the sun to move, the light falls more on one side, and more shadows are cast on the opposite side of the subject.
more information on quality of light:
http://www.ted.photographer.org.uk/photoscience_lighting.htm
http://pages.cthome.net/rwinkler/light.htm

SHUTTER SPEEDS AND APERTURES

Aperture


F-stops
f1 f1.4 f2 f2.8 f4 f5.6 f8 f11 f16 f22 f32 f64

All cameras, whether an ancient film camera, or a more modern digital, work in pretty much the same way. Photographs are taken by letting light fall onto a light-sensitive medium, which records the image.
The aperture controls the amount of light that reaches a light sensitive medium, wither it be digitally, film, or paper. The aperture controls the intensity at which light will strike the film. An aperture acts much like the pupil of an eye that opens larger as light decreases to let in more available light. The pupil shrinks when light increases to reduce the amount of light entering the eye.
Put simply, a camera consists of a light-tight box or even film canister, that stores a light-sensitive device, a lens that magnifies and focuses the image onto that light-sensitive device through a hole in the box (called the aperture), and a shutter that opens and closes when you press the shutter release, exposing the film to the light; this is why a picture is sometimes called an exposure.
The amount of light entering the camera depends on the amount of light in the scenes that you’re photographing. A bright sunny cloudless day has more available light than a cloudy one, which in turn has more light than an indoor scene lit by tungsten lighting. To make the picture look right, we have to expose the film to the right amount of light. Too short, and the image will be light, or underexposed. Too long, and the image will be dark, or overexposed.
The combination of aperture and shutter speed are related, and effect the exposure value. The faster the shutter speed, the larger the opening of the lens and visa versa. Aperture and shutter speed have to come together in balance based on a given lighting scenario to make the proper exposure.

The diameter of an aperture is measured in f-stops. A lower f-stop number opens the aperture and admits more light onto the camera. Higher f-stop numbers make the camera's aperture smaller so less light hits the film.
When an aperture is opened up by one f- stop, the amount of light which reaches the film is doubled.
Aperture settings can be used creatively to control depth of field, how much of a photo is sharp in front and back of where you focus on the main subject. The technique is useful for close-up and portrait shots.

Shutter speed

B 1 2 4 8 15 30 60 125 250 500 1000 2000 4000
The concept of shutter speed isn’t too hard to understand. The longer you leave the shutter open, the more light that strikes the film, resulting in a darker image.
Shutter speeds are measured in fractions of a second, and is the time taken from when the shutter opens to when the shutter closes, after you’ve press the shutter. Moving from one speed to the next either halves the amount of light that can enter the camera or doubles it. The change from one speed to another (and halving or doubling the light that enters the camera) is called moving a stop. What affect does changing shutter speed have on your final image? As well as controlling the amount of light that enters the camera, shutter speed effects motion and blur. While fast shutter speeds can “freeze” motion, slower shutter speeds extend activity or blur moving objects.

EXAMPLES:

Lots of bees - Slow shutter speed - Large aperture -
Shallow depth of field

Not so many bees - Slow shutter speed- Blurry queen

Wingless queen - Fast Shutter speed - Stopping action of the waggle dance

One blurry bee - Slow shutter speed

Sharp bee - Fast shutter speed

Large bee - Small aperture -Plenty depth of field

Small bee - Large aperture - Shallow depth of field

Don't play with bees in traffic - Long exposure - Bad idea

Wednesday, February 4, 2009

FILM DEVELOPMENT

What happens during development

When you expose film to light, by opening the shutter, the light reacts with the light-sensitive silver-halide particles in the film emulsion. At this point, the reaction is invisible. The film must be developed in order for the reaction to be visible. The film is developed using a chemical developer, which turns the exposed silver-halide particles into a black metal (silver). The film stays in the developer for the correct time to turn the right amount of halides into silver. The dark areas in the original image will have the least amount of silver on the film, and appear transparent. The lighter areas, conversely, will have the most silver. This effect is why the developed film is called a negative. In order to stop the development process, water is used. It neutralizes the effects of the developer. At this point the film is developed, however the image is not permanent, there are still unexposed silver-halides in the emulsion. If these particles are exposed to light, they will turn into silver quickly. The film has to be made permanent, this is done with a chemical fixer. The fixer attaches itself to the unexposed silver-halides, preventing them from reacting to the light. The final stop is to remove all traces of the chemicals in a wash step. If fixer is left on the film, it will eventually stain the image. There are additives, like Kodak Hypo Clearing Agent, which can speed up the wash process. After washing, the film must dry.


To develop film you'll need:
  • Running water
  • Chemical Manufacturer Specifications
  • Measuring beakers
  • Place where you can mix liquids
  • Very accurate thermometer, and a method of temperature control
  • Funnels
  • Storage Bottles
  • Developer
  • Fixer
Read the time chart on the side developer container to determine your film, time, temperature combo. Photo developing chemicals can be hazardous, particularly in concentrates, so always use with care.
  1. Measure a certain amount of water at a specific temperature - BEST AT 68 degrees -it's usually easier to have the water hotter than the required temperature and let it cool down, or even use an ice cube to lower the temp (remove the ice cube when the water reaches the right temperature)
  2. Measure a certain amount of concentrate. 1:1- 1 reel tank = 8oz.
  3. When the temperature of the water is at the specified temperature, pour in the concentrate, stirring constantly.
This is the general process, always be sure of your film, temperature, developer combo is correct before proceeding. Use the thermometer during the mixing of chemicals to make sure that you are following the manufacturers recommendations - read the labels.

Starting to Develop

Gather together:
  • A film processing tank and one 35mm reel for each roll you will develop. Some people prefer plastic tanks and reels.
  • A pair of scissors, to cut the film.
  • Measuring graduate(s), to measure the correct amount of chemicals for your film.
  • An accurate thermometer, to determine the temperature of your chemicals and the correct developing times.
  • Film clips or wooden spring-type clothes pegs, to hang your film to dry.
  • A can opener to open your film canister.
  • An accurate timer to time your processing - this can be a watch with a second hand. Some people prefer to use their phones
  • A light proof room, closet or changing bag.
  • Developing chemicals - Developer, Fixer, water

Loading the Film on the reels

  1. Before trying to load film in darkness, practice loading your reel numerous times in light with an old piece of film. Do this until you can do it with your eyes closed.
  2. Put the tank, reel(s), film and scissors in the darkroom in an orderly fashion that makes sense to you.
  3. Check that the room is dark and the door is securely closed.
  4. Open the film canister with a can opener being careful with the open edge.
  5. Pull the film out of the canister - it's wrapped around a spool.
  6. Try to touch the film only on the edges - try not to touch the emulsion.
  7. Trim the end of the film square - cut across the film at a 90 degree angle to give you a straight edge.
For stainless steel reels -
  1. Hold the reel in your left hand with your thumb in the center of the reel, with the spiral turning outward clockwise from your thumb (if you are left handed you may want to reverse the hands and the rotation directions)
  1. Hold the film in your right hand, the spool of film held loosely between your little fingers and palm, and the film as it comes off of the spool between your forefinger and thumb.
  2. Gently squeeze the film between your right thumb and finger, it should curve slightly across the width of the film. It should curve upwards - as long as the spool is feeding over the top (counter clockwise) through your fingers.
  3. Push the end of the film into the center of the reel - some reels have a spring clip to hold the film others have the horns that catch the sprocket holes, I prefer the ones without the horns.
  4. Maintain the gentle squeeze on the film, think ladybug or baby kitten. As you rotate the reel slowly counter clockwise, gently feed the film into the reel. When you practice this you can see that the film is settling in the coils of the reel. Note how this feels so you can tell if you are doing it right in the darkroom.
  5. Continue until you reach the end of the film. Cut off the film at the spool.
  6. Continue sliding the film onto the reel, until it is all on the reel.
  7. Place the rolled film in the canister and securely attach the lid.
  8. Make sure anyone else in the darkroom with you is prepared and open the door
  9. MOST IMPORTANTLY - clean up any mess left behind.

For plastic reels -ask for help. We prefer you to use stainless, you'll thank us later...

Preparing to Develop Black and White Film

  1. For this step you need: Loaded tank, chemicals, water, and a thermometer. This is the critical step in developing Black and White film. Using the wrong amount of chemicals, or the wrong temperature or time will adversely affect your film. Most developers have an optimum temperature. The developer we use - D76 is rated for 68 degrees.
  2. REMEMBER- the four most important aspects to film development are:
  3. TIME
  4. TEMPERATURE (Usually 20°C or 68°F)
  5. AGITATION
  6. and DILUTION (Generally 1:1)
  7. Mix the chemicals according to the manufacturers instructions (1:1). Pour the correctly diluted solutions your developing tank - make sure you have the right amount for your tank - it's listed on the instructions. It is best to use the same temperature every time, for consistency, rather than adjusting the time for different temperatures.


Developing Step

  1. fill the tank with water roughly the tempurture of your developer and presoak you film to "wake it up" for processing. Bang. Tap the tank on a hard surface - helps to dislodge any air bubbles.
  2. When you are absolutely sure the developer is at the right temperature pour it in your tank at a slight angle - start the timer set according to development chart.
  3. Agitate for the first 30 seconds
  4. Continue agitating at regular intervals throughout the developing stage. I suggest agitating for the first 30 seconds, then each minute thereafter, at the top of the clock for about 10 seconds.
  5. The most important part about agitation is to do it the same way every time. Some people say I over agitate, but it's the way I started, and I do it consistently.
  6. At the end of the time, based on the development chart to start, later you will refine your developing time, remove the outer cap (ONLY!) and pour the developer out, either down the drain with running water or into a bucket for later disposal.

Water bath

  1. Pour the H20 into the tank, through the hole in the inner lid, then put the outer lid on.
  2. Agitate continuously for 30 seconds. But don't forget to invert and bang.
  3. Remove the outer lid, and pour out the chemicals.

Fixer

  1. Pour the fixer into the tank from the container clearly marked FIX, through the hole in the inner lid, then put the outer lid back on. Be sure to make a hash mark on the continer for every roll of film you develop.
  2. Agitate. I agitate for about 20 seconds, then every minute for about 10 seconds.
  1. At the end of the manufacturers recommended time - 5 mins for normal film, 10 mins for T grain film. Remove the lid (it's now safe to remove the whole lid if you want), and pour the chemistry back in the container. DO NOT POUR FIX DOWN THE DRAIN!!

Rinse and Hypo

  1. Remove the inner lid.
  2. Run water into the tank. I like to run water for about 15 seconds.
  3. Fill tank with Hypoclear and agitate consistantly for 2 minutes.
  4. Pour Hypoclear back into the correct container, be careful not to mistake FIX and HYPO bottles.

Washing

1. Place film in Turbo washer - turn on water to create bubbling, think champaine not fish
filter.
2. Wash film for 5 minutes. CLEAN-UP WHILE YOUR FILM IS WASHING!
3. *Be sure to never add film to wash once initial cycle has started.

Photo-flo (LFN)
  1. Empty the tank, and fill with wetting agent (Kodak Photo Flo, diluted correctly - 5 drops to distilled water).
  2. Put the reel(s) in the wetting agent according to the recommendations (30 seconds).
  3. Remove the reel from the tank.
  4. Slowly pull the film off of the reel.
  5. Using your fingers as a squeegee, ever so gently, squage your film over the waste basket to remove any water droplets.
  6. RESIST THE TEMPTATION TO LOOK AT FILM WHILE WET, unless you like dust.
  7. Weight the bottom of the film, with clothes pin, or film clip. Be careful to not scratch the negatives, they are very soft at this point.
  8. Hang in the drying cabinet
  9. RELAX... film takes about 20-30 minutes to dry. Weather permitting.

Storing

  1. Remove the weight from the bottom of the film.
  2. Count up 5 frames, cut between the 5th and 6th frame. 5 frames fits across an 8" sheet of paper, and fits into negative sleeves.
  3. Put each strip into a separate negative sleeve.
  4. Label the sleeve with a sharpie
  5. Keep cutting into 5 frame lengths until you've cut the entire length of film.
  6. NEVER LEAVE ONE FRAME AT THE END, better to have at least 2 frames next to each other.